In fairness, it should be noted that many popular navigation applications for iOS, for example, such as Yandex. Maps, can also download offline versions of city maps. But in the case of MapTiler GPS MBTiles, users can save their own map in the device memory. It could be even a map of Middle-earth from the book The Lord of the Rings.
In this case, navigation will be carried out using a GPS module. One such application is MapTiler GPS MBTiles. This article provides a quick guide on how to make and upload your cards to iPhone.
Before you start downloading offline maps to MapTiler GPS MBTiles, there are a few things to consider:
– The service supports formats – TIFF / GeoTIFF, MrSID, ECW, JPEG2000, Erdas HFA, NOAA BSB, JPEG.
– To create a map, you need a computer based on Windows or OS X.
– Dropbox account comes in handy to transfer the map to the device memory.
To create an offline map in MapTiler GPS MBTiles you need:
1. Purchase the MapTiler GPS MBTiles Viewer application itself in iTunes for 119 rubles.
2. Download the MapTiler desktop version of the application (there are versions for Windows, Mac and Linux).
3. Find a map in the required format. This can be done using any popular search engine.
4. Launch the desktop version of the MapTiler application.
5. In the main application window, click on the Standart Tiles item.
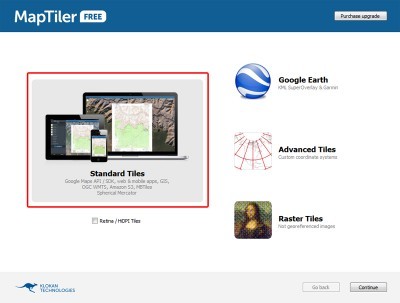
6. Drag the map file into the main window of the MapTiler application.
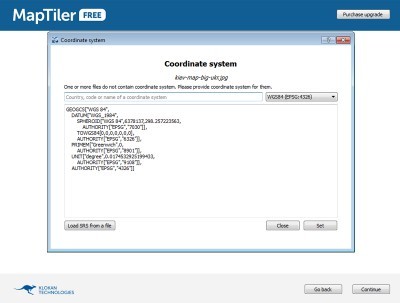
7. In the window that opens, confirm the coordinate system.
8. Next, you need to bind the image to the coordinates on the map. This can be done in several ways.
interesting 6.1-inch iPhone 12 and iPhone 12 Pro will go on sale first FAS will start another check Apple
Assign location visually can be considered one of the simplest.
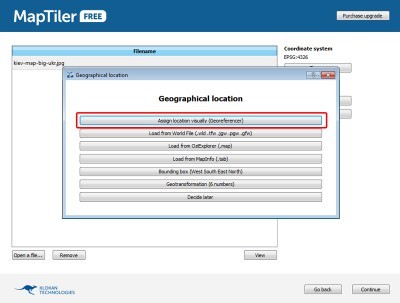
When choosing this item, you need to find and mark the same points on the image and on online maps. For example, major attractions, road junctions, etc. Three points are sufficient for anchoring.
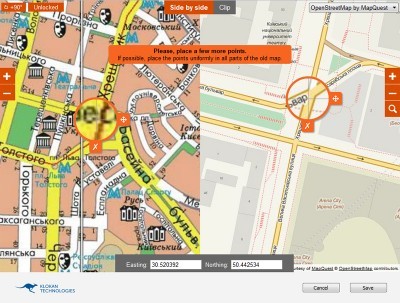
9. After adding three points, press the Save button. If necessary, the coordinates can be changed by clicking on the Change item.
10. Press the Continue button.
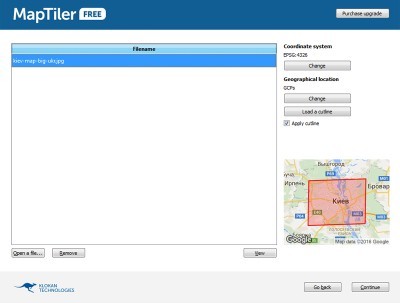
11. In the new window select the MBTiles item and press the Render button.

12. Enter the name of the map and select the directory where the finished file will be saved.
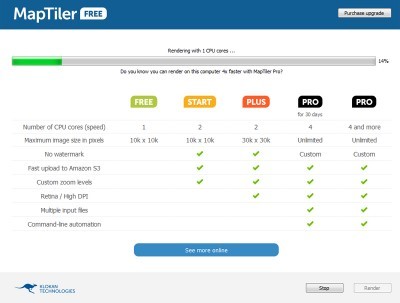
13. Wait until the file preparation process is completed.
14. In the new window, select the Send to mobile item.
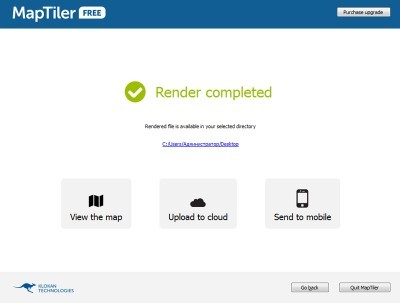
15. In a new window, enter your Dropbox account information and wait until the finished map is uploaded to the cloud.
16. Launch the MapTiler application on your mobile device.
17. Open the additional menu and go to the settings section.
18. Click on Link Dropbox.
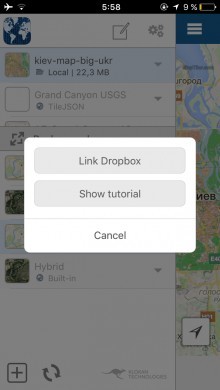

19. Enter your Dropbox account information and allow MapTiler to access the Applications folder – MapTiler.
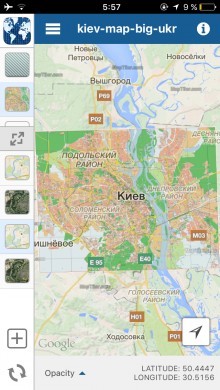
20. After that, a new card will appear in the left column. So you can upload your cards to iPhone and start using them.
It's worth noting that MapTiler has several different subscriptions. Depending on the 'package' chosen, users have access to different functionality. For example, in the free version there are restrictions on the maximum size of the map (10 by 10 thousand pixels), and the speed of rendering the map is also artificially limited. Users can remove all restrictions if necessary. However, not everyone needs this, to upload their cards to iPhone the free version is enough.