App Store, besides a huge number of mobile photography apps, there are also useful tools for DSLR photographers. Among them, programs from the developer Crookneck Consulting LLC are considered a must-have. Today we'll see if an app called The Photographer's Transit – it's Photo Transit – lives up to its title.
This application is indispensable for photographers on the road.
You can always see in advance what species can potentially be captured in the photo, choose the optimal location for shooting and the necessary optics, so that upon arrival you will be fully armed.
This saves dozens of hours, allows you to carry a minimum of equipment with you and virtually eliminates the possibility of force majeure.
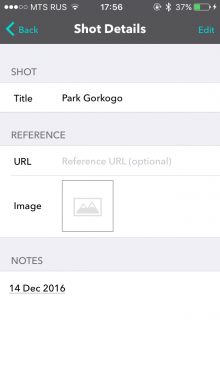
In the program itself, the most difficult thing is to understand the interface. The first thing to do after opening the program is to click on the image icon in the upper left corner: a list of projects will open. By default, there is only a folder with 8 examples, you can add your own folders and fill them with projects. Let's say we create a Parks folder and add two projects to it: Muzeon and Gorky Park.
Here, a shortcoming of the program immediately comes out: when filling out information about the project (name and notes), you cannot change the keyboard language: you can write only in English. There is no paste option, so even in a complex way (type in Notes – copy – paste in Photo Transit) the name in Cyrillic cannot be added. This is very strange, because in other places you can type in Cyrillic – moreover, the keyboard switches even when filling in the URL field in the project card: adding sites with the .рф domain is not a problem.

interesting 6.1-inch iPhone 12 and iPhone 12 Pro will go on sale first Now officially: the announcement of iPhone 12 will take place in a week
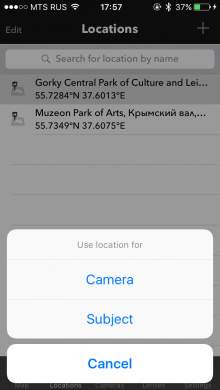
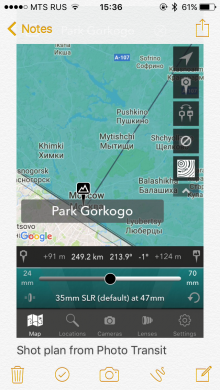
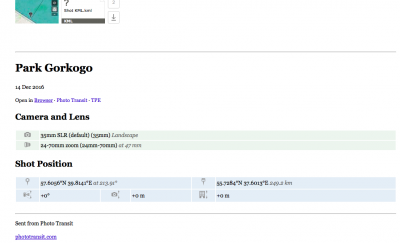
So, we have created a project, it's time to move on to planning. First, in the Locations tab, we look for the place that we want to photograph, and mark it as “Photo” – that is, the object of the photo. Searches can be saved if the location is used for multiple shots. The program finds the specified place, after which you need to roughly determine the position of the photographer – accuracy is not required at this stage. It turns out a kind of triangle, in which the face opposite the photographer marks what exactly will fall into the frame.
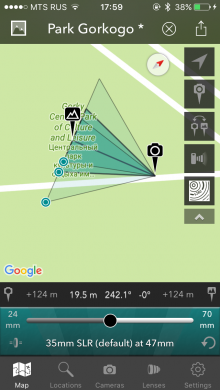
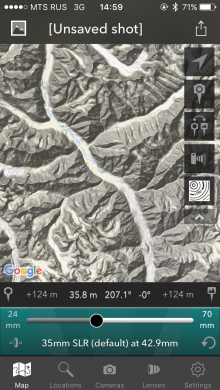
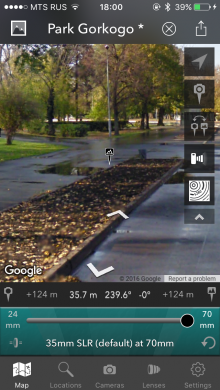
You can play with the map display modes: get satellite images, open the panorama Google Street View (not available everywhere) or select the “relief” mode, which is indispensable for photographing in hilly areas or in the mountains. Unfortunately, when zoomed in, all of the terrain disappears and the map looks flat again. By opening the panorama mode, you can clearly see what will appear in the lens under these shooting conditions.
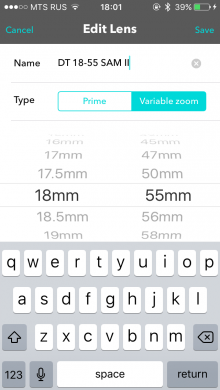
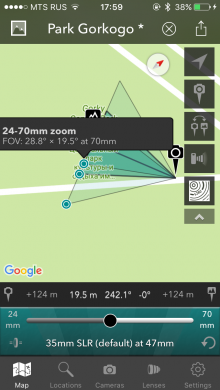
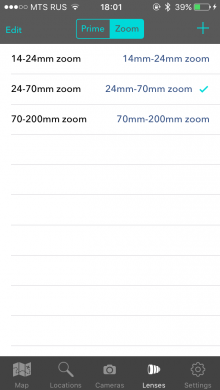
Speaking of lenses: you can add several of them, and then the same triangle will be divided into segments that reflect the angle of view for a particular lens. In theory, you can add them yourself, but they simply are not saved, you have to use those that are already set.
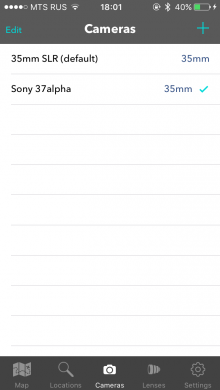
You can also add cameras, but here you can only register its model and the size of the matrix.
So, we have written everything, provided for every detail, it remains only to understand what can be done with the project – that is, where we can export it. There are not many options: export the map to the Camera Roll as an image, save it to Notes (a screenshot of the map and the inscription “Shot plan from Photo Transit are saved), add it to a reminder or calendar, send it by email or via AirDrop.”
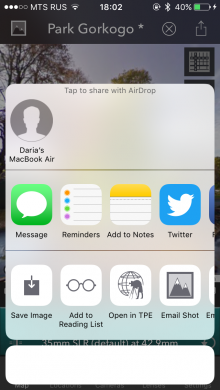
In the last two cases, you will receive a file in KML format – it is used in programs Google Planet Earth and Maps Google. You can open such a file on macOS using the applications Google Earth, Merkaartor, Blender with the plugin Google Earth Importer or Keyhole PRO. In addition to .KML, you also send a screenshot of the map and all changed data in an email.
The app really helps to save time on planning shots (you can think over a few photos while you are on the subway), but at the same time, flaws like the broken Cyrillic alphabet and mistakes when adding lenses somewhat darken the overall good impression of this app for iPhone.