 Today is Thursday and as usual we are posting new programming material at iOS. As you will recall, in the previous two parts of the third tutorial, we created the 'Recipe Book' app for iOS. In today's lesson, we will complete the development of this program and fix all the remaining bugs. In this series, we will make a detailed description for each of the recipes, assign a unique image for each of the dishes, and analyze a small customization of the Navigation Bar Controller.
 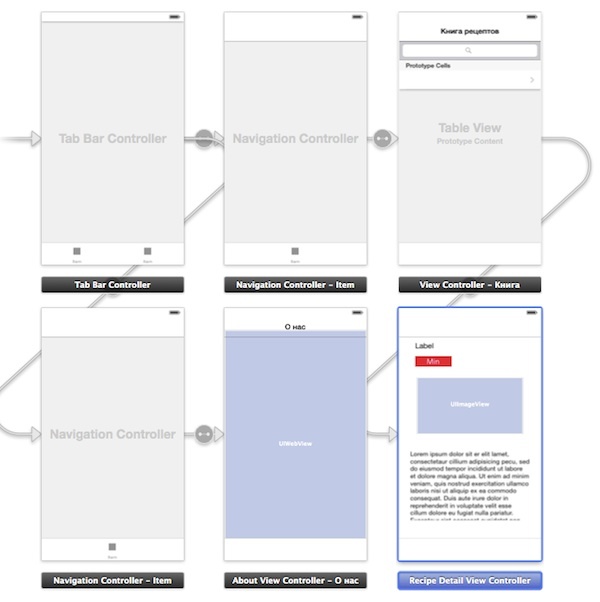 So, our main task today will be to add a complete description for each recipe in the program. To do this, we will pass the ID number of the pressed cell in the table to the new class. Since we know which recipe belongs to which number, we will apply the if else condition in theDetailViewController class. That is, we will compare the identifier number with numbers, and if the result is positive (true), the program will display the desired description for the dish.
 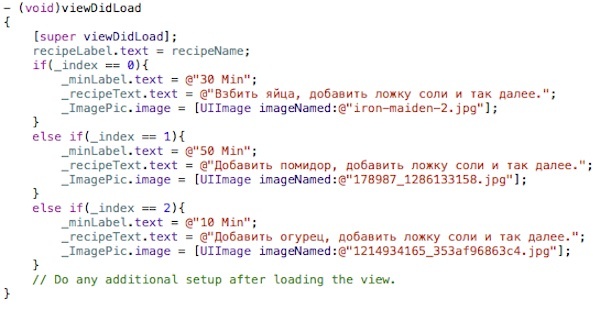 The next step is to add unique images to our recipes. The program will determine which picture should be displayed using the same if else construction. And the image itself in recipes will be displayed using the UIImageView function. We will arrange all the elements in their places in the Storyboard.
 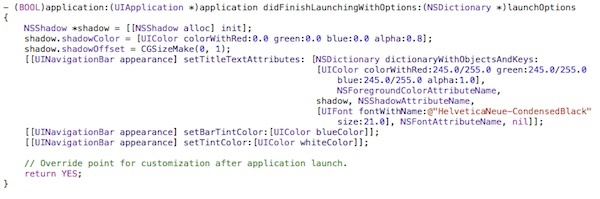 Finally, we will tell you how you can easily customize the Navigation Bar Controller, namely, how to change the font style, point size, color, background, etc. This is done quite simply by adding a few lines of code to the AppDelegate.m file. https://www.youtube.com/watch?v=tMdFAcToIHo So, in the third lesson we created a full-fledged application, but as you noticed, all recipes are stored in a static form inside the code – that is, if you want to add a new recipe, then will need to release an update to the application. Therefore, in the next lesson, I will tell you how to get data from the Internet. Download project sources In order not to miss anything, subscribe to my YouTube channel.